Friday, July 28, 2006
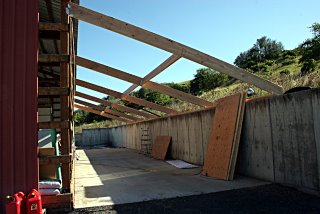
We finished installing the stringers Wednesday morning (except for the ones requiring support brackets). We fastened them all together with screws we had left over from joining the two 2”x12”x18’ rafters so I don’t think they’re going anywhere soon.
Roger is in Spokane for the air show this weekend so we won’t be doing anything more on the barn until he returns. He flew his “twirley-bird” to Spokane while I drove dragging along all the paraphernalia that he couldn’t carry in the helicopter; you know doors, sandbags, tent, water, luggage, and other things of importance that probably will not be used.
While we were in Spokane we picked up the hardware we need to complete installation of the stringers and made a Costco run (shudder). Remarkably we managed to escape from Costco with very little more than those things we went in to purchase. That’s nearly a first on our record. Maybe our fortunate escape was because we had no way to get some of the items we would have purchased home without major changes in chemistry during the long trip home in the heat.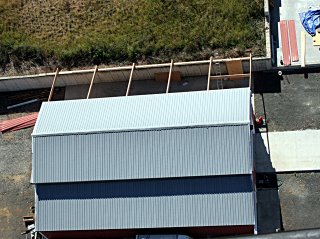
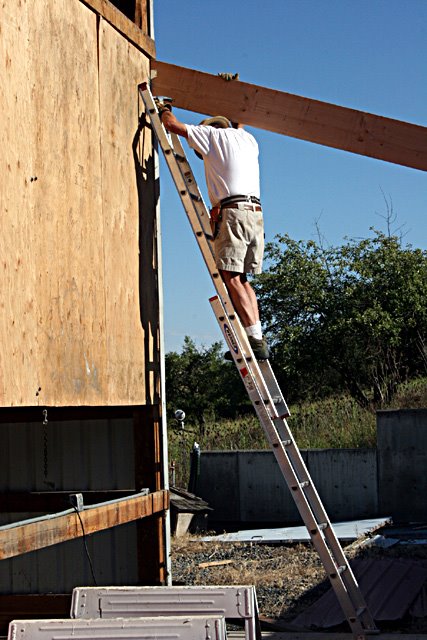
Yes, I know the photo does not show the progress but it's a cool photo just the same.
Monday, July 24, 2006
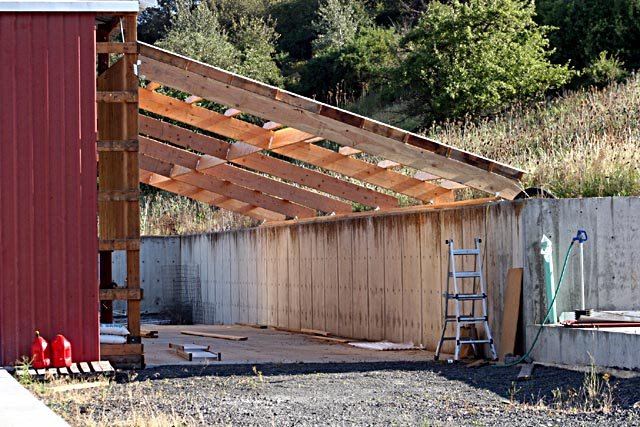
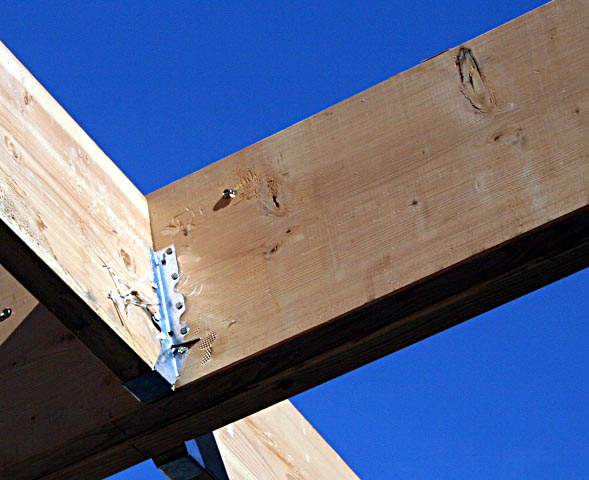
We installed the brackets to support the stringers this morning. They are held in place with two screws each. We put in 50 brackets and are still 4 short. We ran out of brackets about 11:00 AM.
We then began putting up the stringers with the hope that we would have most of them done today. Some where along the way we became side tracked.
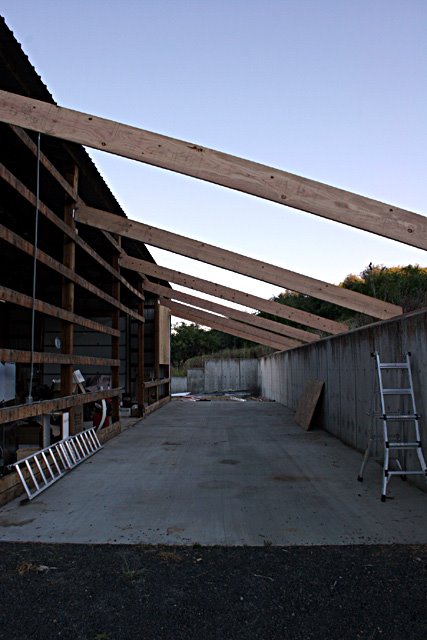
We were curious as to what the barn was going to look like with the roof on it. We completed all of the stringers on the north end of the barn addition and brought up a couple of the steel roofing panels.
Putting the panels on was the easy part. Keeping them there was a little more complicated. The panels kept sliding off until we could get a couple of screws into them.
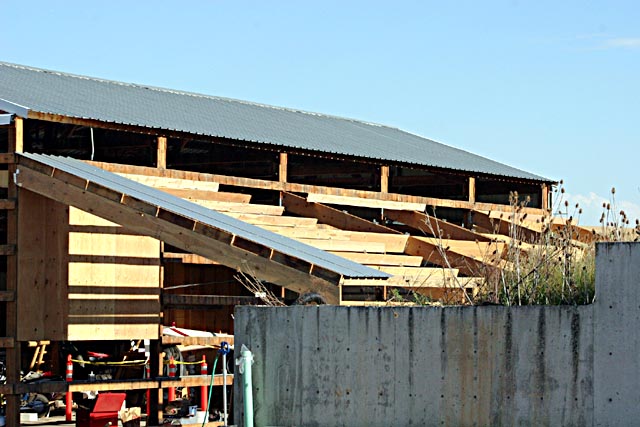
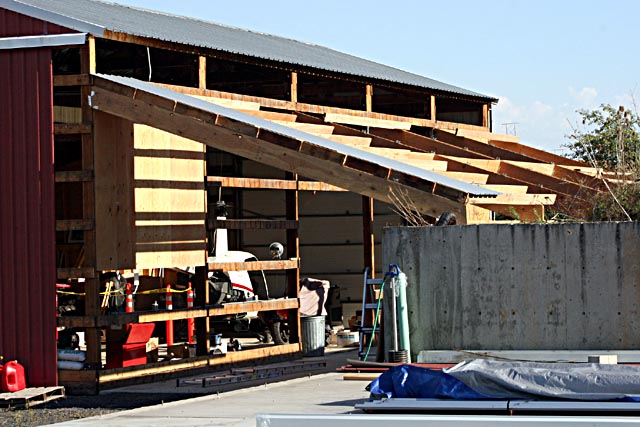
The stringers are spaced 24” apart. When they are complete there will be 9 stringers supporting the 18’ roofing panels.
We put four roofing screws in each panel every place it crosses a stringer. For those of you who are mathematically challenged, that’s 36 screws per panel. The panels are 24” wide (that's 2'). The barn addition is 60’ long. We need a total of 30 panels.
We have installed two panels and used 72 screws. So, how many more screws do we have to install? That’s right, 1008 more to go… Piece of cake, right? And now we'll discuss that bridge.
Sunday, July 23, 2006
I have a new appreciation for construction workers. There is so much more to their job than meets the eye.
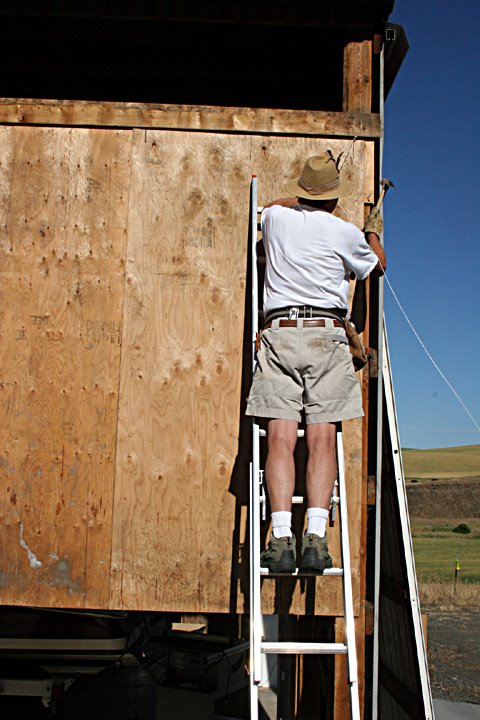
We put the last of the bolts in the shear wall on Saturday. Installing the bolts required that I stand as far up on the ladder as I dared and stretch out my right hand in which I held a long handled ratchet. The ratchet was placed over the head of a hex head bolt higher up on the shear wall. My husband, on the other side of the wall, tightened a nut on the bolt. My only difficulty was in preventing the ratchet from being ripped out of my hand while keeping my balance on the ladder. Glad I’m not afraid of heights.
We put the last of the bolts in the shear wall on Saturday. Installing the bolts required that I stand as far up on the ladder as I dared and stretch out my right hand in which I held a long handled ratchet. The ratchet was placed over the head of a hex head bolt higher up on the shear wall. My husband, on the other side of the wall, tightened a nut on the bolt. My only difficulty was in preventing the ratchet from being ripped out of my hand while keeping my balance on the ladder. Glad I’m not afraid of heights.
I thought the fiberglass panels or the stringers would be the next step. Wrong again.

 Instead, we began putting 3” screws through the rafters. The screws hold the two 2”x12”x15’ rafters together so they work together as a single 4”x12”x15’ rafter. I personally drove in more than 40 screws. I have the bruises to prove it too.
I really do think the stringers are next… At least I hope so.
Thursday, July 20, 2006
We’re almost finished with the shear wall (one side anyway). We will finish the rest of the nailing tomorrow hopefully without having to purchase more nails. We will begin nailing in the fiberglass panels next. I still wonder, “What ever were we thinking?”
I would resign my position as junior carpenter but Roger bought me a new hammer today. That does not bode well for me because there’s still sooo much to be done. Hmmm, I wonder if he saved the receipt. I’ve got to think about that one.
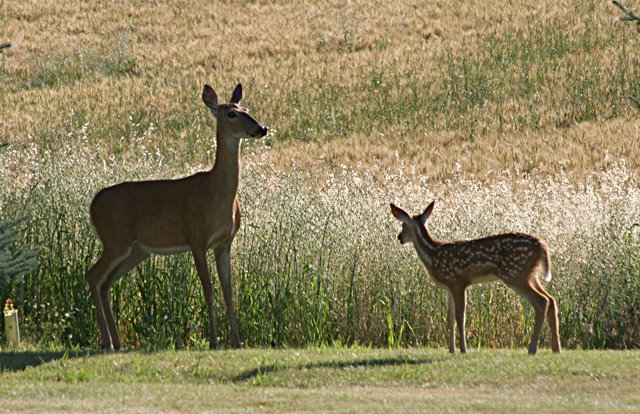
Anyway, since any photo I take of the barn would look nearly like the one I took yesterday I’m not putting in one of the barn.
 Instead, I’m putting in a photo Roger took of one of our early morning visitors. This is the first fawn we’ve seen in our yard this year. The doe could hear the camera clicking and wanted to leave. The fawn wasn’t quite ready and wanted to romp in the lawn where the grass was not over his/her head. Too soon though the fun ended and Mom coaxed her new born into the tall grass and out of sight.
I would resign my position as junior carpenter but Roger bought me a new hammer today. That does not bode well for me because there’s still sooo much to be done. Hmmm, I wonder if he saved the receipt. I’ve got to think about that one.
Anyway, since any photo I take of the barn would look nearly like the one I took yesterday I’m not putting in one of the barn.
 Instead, I’m putting in a photo Roger took of one of our early morning visitors. This is the first fawn we’ve seen in our yard this year. The doe could hear the camera clicking and wanted to leave. The fawn wasn’t quite ready and wanted to romp in the lawn where the grass was not over his/her head. Too soon though the fun ended and Mom coaxed her new born into the tall grass and out of sight.
 Wednesday, July 19, 2006
We began work on the second shear wall today. Having learned from completing the first wall we did this one a bit differently. Unfortunately, we did not have the lumber to complete the header and footer (Oops!) and will have to finish it tomorrow.
Our picnic table arrived today so we had dinner outside. It’s so pleasant here. Oh well, early to rise tomorrow: it’s going to be in the 90’s so we want to get an early start so we can finish the wall before it really gets hot.

Roger and I did not work on the barn project Tuesday. He went to Spokane to see about displaying his helicopter in the air show next week and I painted in my studio. So…I have no new photos to show of the work done on the barn. Tomorrow will be different so I’ll continue that narrative then.
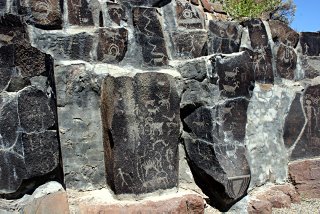
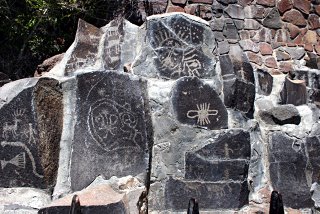
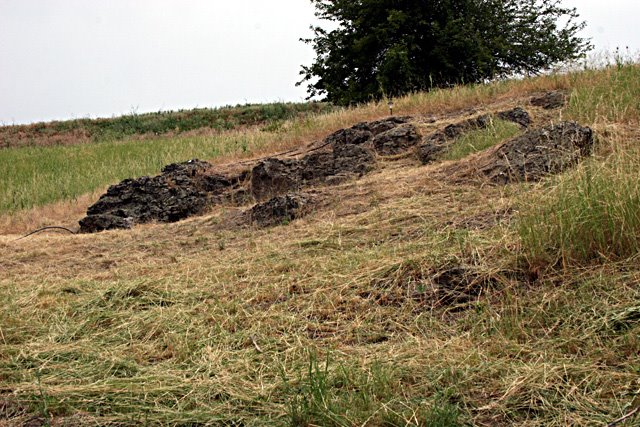
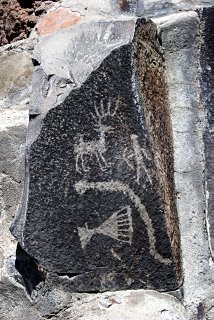 These are petroglyphs we photographed during our trip to the Ohme Gardens in Wenatchee. They were carved into the rock originally located at the base of the cliffs. When the Columbia River was dammed up the area where the petroglyphs was located became flooded. The rocks were removed from their original location to a higher elevation in amongst the petrified Ginkgo trees so that they might be preserved.


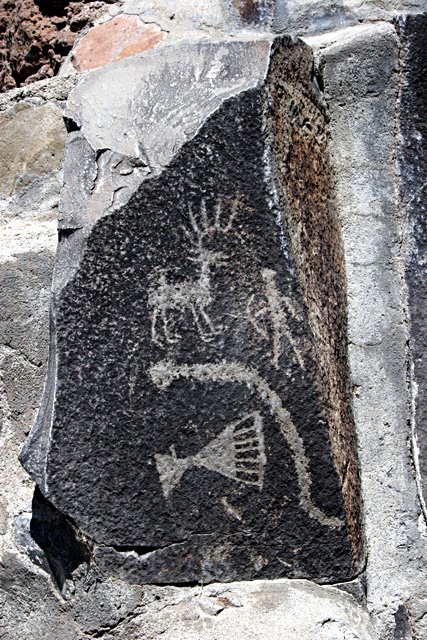 These are petroglyphs we photographed during our trip to the Ohme Gardens in Wenatchee. They were carved into the rock originally located at the base of the cliffs. When the Columbia River was dammed up the area where the petroglyphs was located became flooded. The rocks were removed from their original location to a higher elevation in amongst the petrified Ginkgo trees so that they might be preserved.
Monday, July 17, 2006
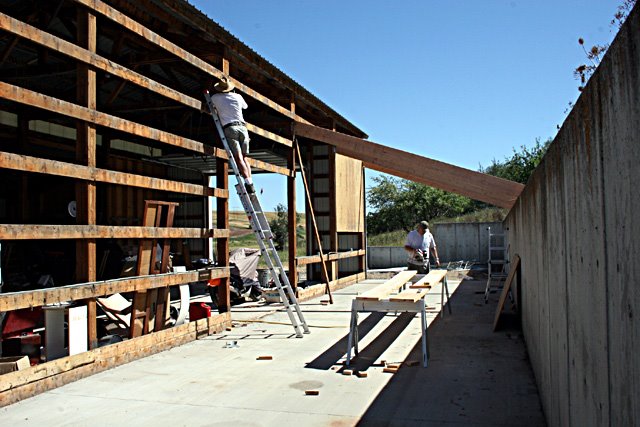
Today Roger and I finished installing the spreaders in between the rafters on the barn. Building the expansion seems so simple until you get into the minutia of the construction. I don’t think anyone really appreciates the complexity of an expansion bridge or an automobile until we actually have to build one.
 We’re fortunate that a good part of the preparation (the footings, floor and west wall) were already complete. All we need to do is put on the roof and the north and south walls. I don’t think we would have undertaken the project if we had had to build it from the ground up.
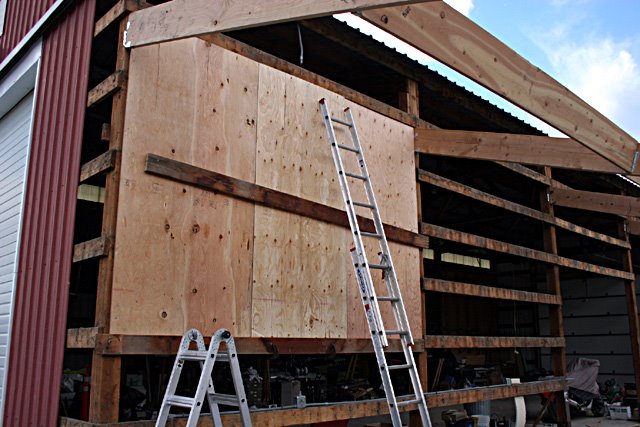
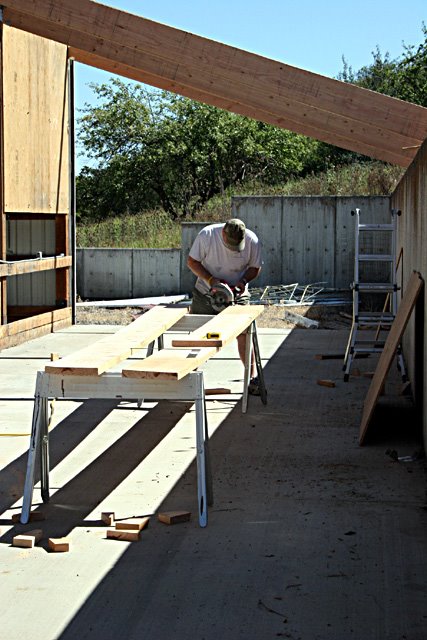
Our next step in the construction will be to install the fiberglass panels on the side of the barn below the existing roof and above where the new roof will be built. After that we will install the stringers to support the metal roof and then the roof itself. Either the material is getting heavier or I’m getting tired. Then again, maybe it’s all the nails. I don’t think the barn will blow over in a windstorm but it may collapse from the weight of the nails.
 We’re fortunate that a good part of the preparation (the footings, floor and west wall) were already complete. All we need to do is put on the roof and the north and south walls. I don’t think we would have undertaken the project if we had had to build it from the ground up.
Our next step in the construction will be to install the fiberglass panels on the side of the barn below the existing roof and above where the new roof will be built. After that we will install the stringers to support the metal roof and then the roof itself. Either the material is getting heavier or I’m getting tired. Then again, maybe it’s all the nails. I don’t think the barn will blow over in a windstorm but it may collapse from the weight of the nails.
Friday, July 14, 2006
We started construction on the barn project this last week. The first order of business was to remove some of the siding and construct a 12’ shear wall.
It probably would have been easier to build it near the ground but Roger wanted it up near the roof line… so, that’s where it went. The shear wall consists of 6 full sheets of ¾” plywood (3 on each side of the wall). We also made two posts of (3) 2 x 4’s and placed them between the plywood 4 feet apart. The plywood was nailed (and bolted) to the 2 x 4’s and to the 6 x 6 posts (supporting the whole mess) on either end of the plywood wall. All of this “lumber” was lifted (piece by piece) about 4’ off the ground to a bottom 2 x 6 that Roger constructed to serve as the base for the shear wall. I, for one, have discovered that lifting a full sheet of ¾” plywood over one’s head is not an easy task; but… we got it done.
In addition to the bolts, the plywood is secured to the 2 x 4’s and to the 6 x 6 posts by nails spaced about 4” apart all the way around the plywood (on both sides). I helped get the wall up. Poor Roger did all the nailing and bolting.

Once we got the wall completed we put up one of the support rafters so we could get the length and angle correct.
Today (Friday) Roger removed the rest of the siding on the barn and also removed a few of the supporting 1 x 6 horizontal supports in preparation for putting in the shear wall at the north end of the barn.
Having learned from our “mistakes” we should be able to do the second wall more quickly than the first. We’ll work on that next week.
Patrick helped Roger today with the rest of the support rafters. Thank you, Patrick. I don’t think I could have done it.
Now, if we can just stay on task and begin NO NEW PROJECTS I think we might have a chance of getting the barn done this year.
Saturday, July 08, 2006
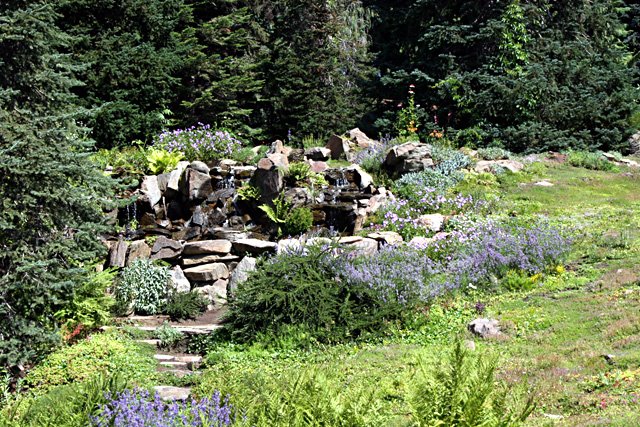
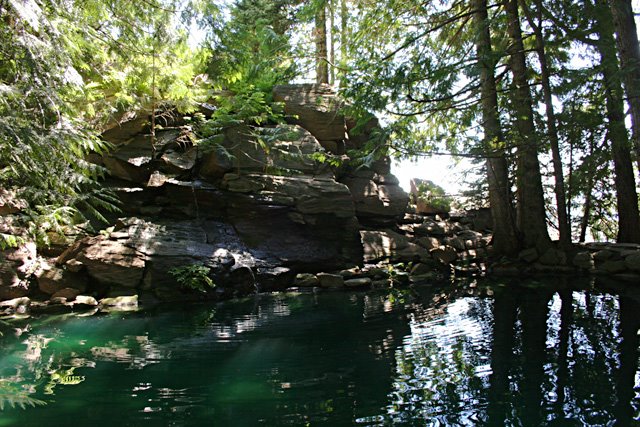
A few days ago Roger called me outside to view his latest creation (Roger is so full of surprises). I went to see what he was all excited about and… we have (had) a waterfall (sort of). If you look closely you can see the water running over the rocks and onto the ground below.

Roger used the weed whacker to clear away some of the tall grass and weeds around the rock outcropping on the hill so we would have a better overall view of the area we want to landscape. He then experimented with the hose letting the water run over the native rocks. In doing this we figured out where to plant our trees. We don’t want the trees to interfere with our view of the falls.
The rock outcropping is partially covered with dirt. We found this out when we began to dig holes for the trees. Finding a soft spot large enough to accommodate the trees was a bit of trial and error (mostly error). But, we were able to find a couple of soft spots near the rocks and the trees are in the ground. Hopefully they will survive.
Our plan is to put in a basin in below the falls with a pump so that we are able to re-circulate the water and keep the falls going. Knowing what we learned from planting the trees we only hope that we will be able to find a third soft spot for the basin. If we can’t dig
 down we will need to build up and the hill is not an easy climb (about a 15-20% grade). Hauling rocks of any size up the hill will not be an easy task.
 Last year I cleared more than three quarters of the hill with the weed whacker. The task took me about two months. I may not be fast but I’m consistent. I think Roger now has a greater appreciation of the effort.

To give you a better understanding of the size of the task, this is the view from the location of the waterfall. If you look closely I think you can see Roger standing there. Gosh, we have a long way to go...
Monday, July 03, 2006

I think we’re through planting trees and shrubs for this year; well almost anyway. We still have a small Ginkgo tree to plant plus two more cedar trees we purchased from the Ohme Gardens. Once these are in the ground we will have planted about 100 plants; not counting the replant of the vegetable garden.
We got some really great ideas about landscaping the hill in back of the house during our visit to the Ohme Gardens. We brought back a few photos. No, I did not misspell home it’s really Ohme.
Of course this is going to involve hauling a bunch more trees and shrubs plus an abundance of other plants up a steep hill; not to mention carving out a path and placing paving stones for access. We will also need to develop a system for watering the plants and supplying water to a small pond and waterfall.
This is definitely not a project to be done quickly, but it should be fun (yea right). Maybe a better term would be challenging.
Let me know what you think…
![]()